


About this app
Introduction
MEP Level Filters is a powerful Revit plugin designed to streamline the process of applying view filters to MEP linear elements. This plugin simplifies the task of assigning colors to different MEP elements based on their reference levels, making it easier for designers to visually inspect and organize their models. In this review, we will explore the key features and benefits of MEP Level Filters and discuss how it can enhance the workflow of MEP designers.

(Image by: Olga Riabinkova)
Key Features
The main feature of MEP Level Filters is the ability to copy the reference level of MEP linear elements into a user parameter, which can then be used to apply view filters. This is particularly useful for elements such as pipes, ducts, conduits, and cable trays, whose reference levels cannot be directly used in view filters.
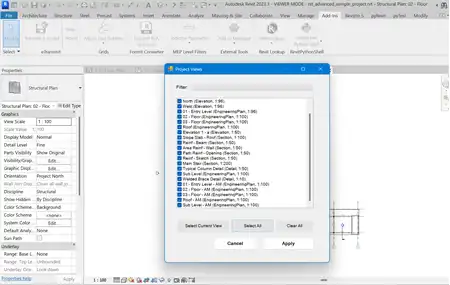
Using the plugin is simple and straightforward. Users can easily indicate a parameter, apply filters, and assign colors to MEP elements belonging to the same level. The plugin uses random colors for differentiation, and users have the option to reapply filters until they are satisfied with the color scheme.
Another handy feature of MEP Level Filters is the "Delete Filters" button, which allows users to remove filters from the model and clean the user parameter of copied values. This helps maintain the accuracy of data in the user parameter, especially after making changes to the model.

(Image by: Olga Riabinkova)
Benefits for MEP Designers
MEP Level Filters offer several benefits for MEP designers. By automatically assigning colors to MEP elements based on their reference levels, the plugin simplifies the process of visual inspection and organization. Designers can quickly identify and differentiate between elements belonging to different levels, making it easier to navigate and understand complex MEP models.
The ability to copy reference levels into a user parameter and apply filters provides a convenient way to customize the visual representation of MEP elements. This not only improves the clarity of the model but also enhances communication with other project stakeholders.
Furthermore, the option to delete filters and clean the user parameter ensures that data remains accurate and up-to-date, even after modifications have been made to the model. This helps maintain the integrity of the design and prevents errors caused by outdated information.

(Image by: Olga Riabinkova)
Conclusion
MEP Level Filters is a valuable tool for MEP designers working in Revit. Its user-friendly interface, intuitive features, and practical benefits make it a must-have plugin for anyone involved in MEP design. By simplifying the process of applying view filters to MEP linear elements and improving the visual organization of models, MEP Level Filters can significantly enhance the workflow and efficiency of MEP designers. We highly recommend trying out this plugin and incorporating it into your design process for a smoother and more productive experience.

(Image by: Olga Riabinkova)

(Image by: Olga Riabinkova)

(Image by: Olga Riabinkova)

(Image by: Olga Riabinkova)


